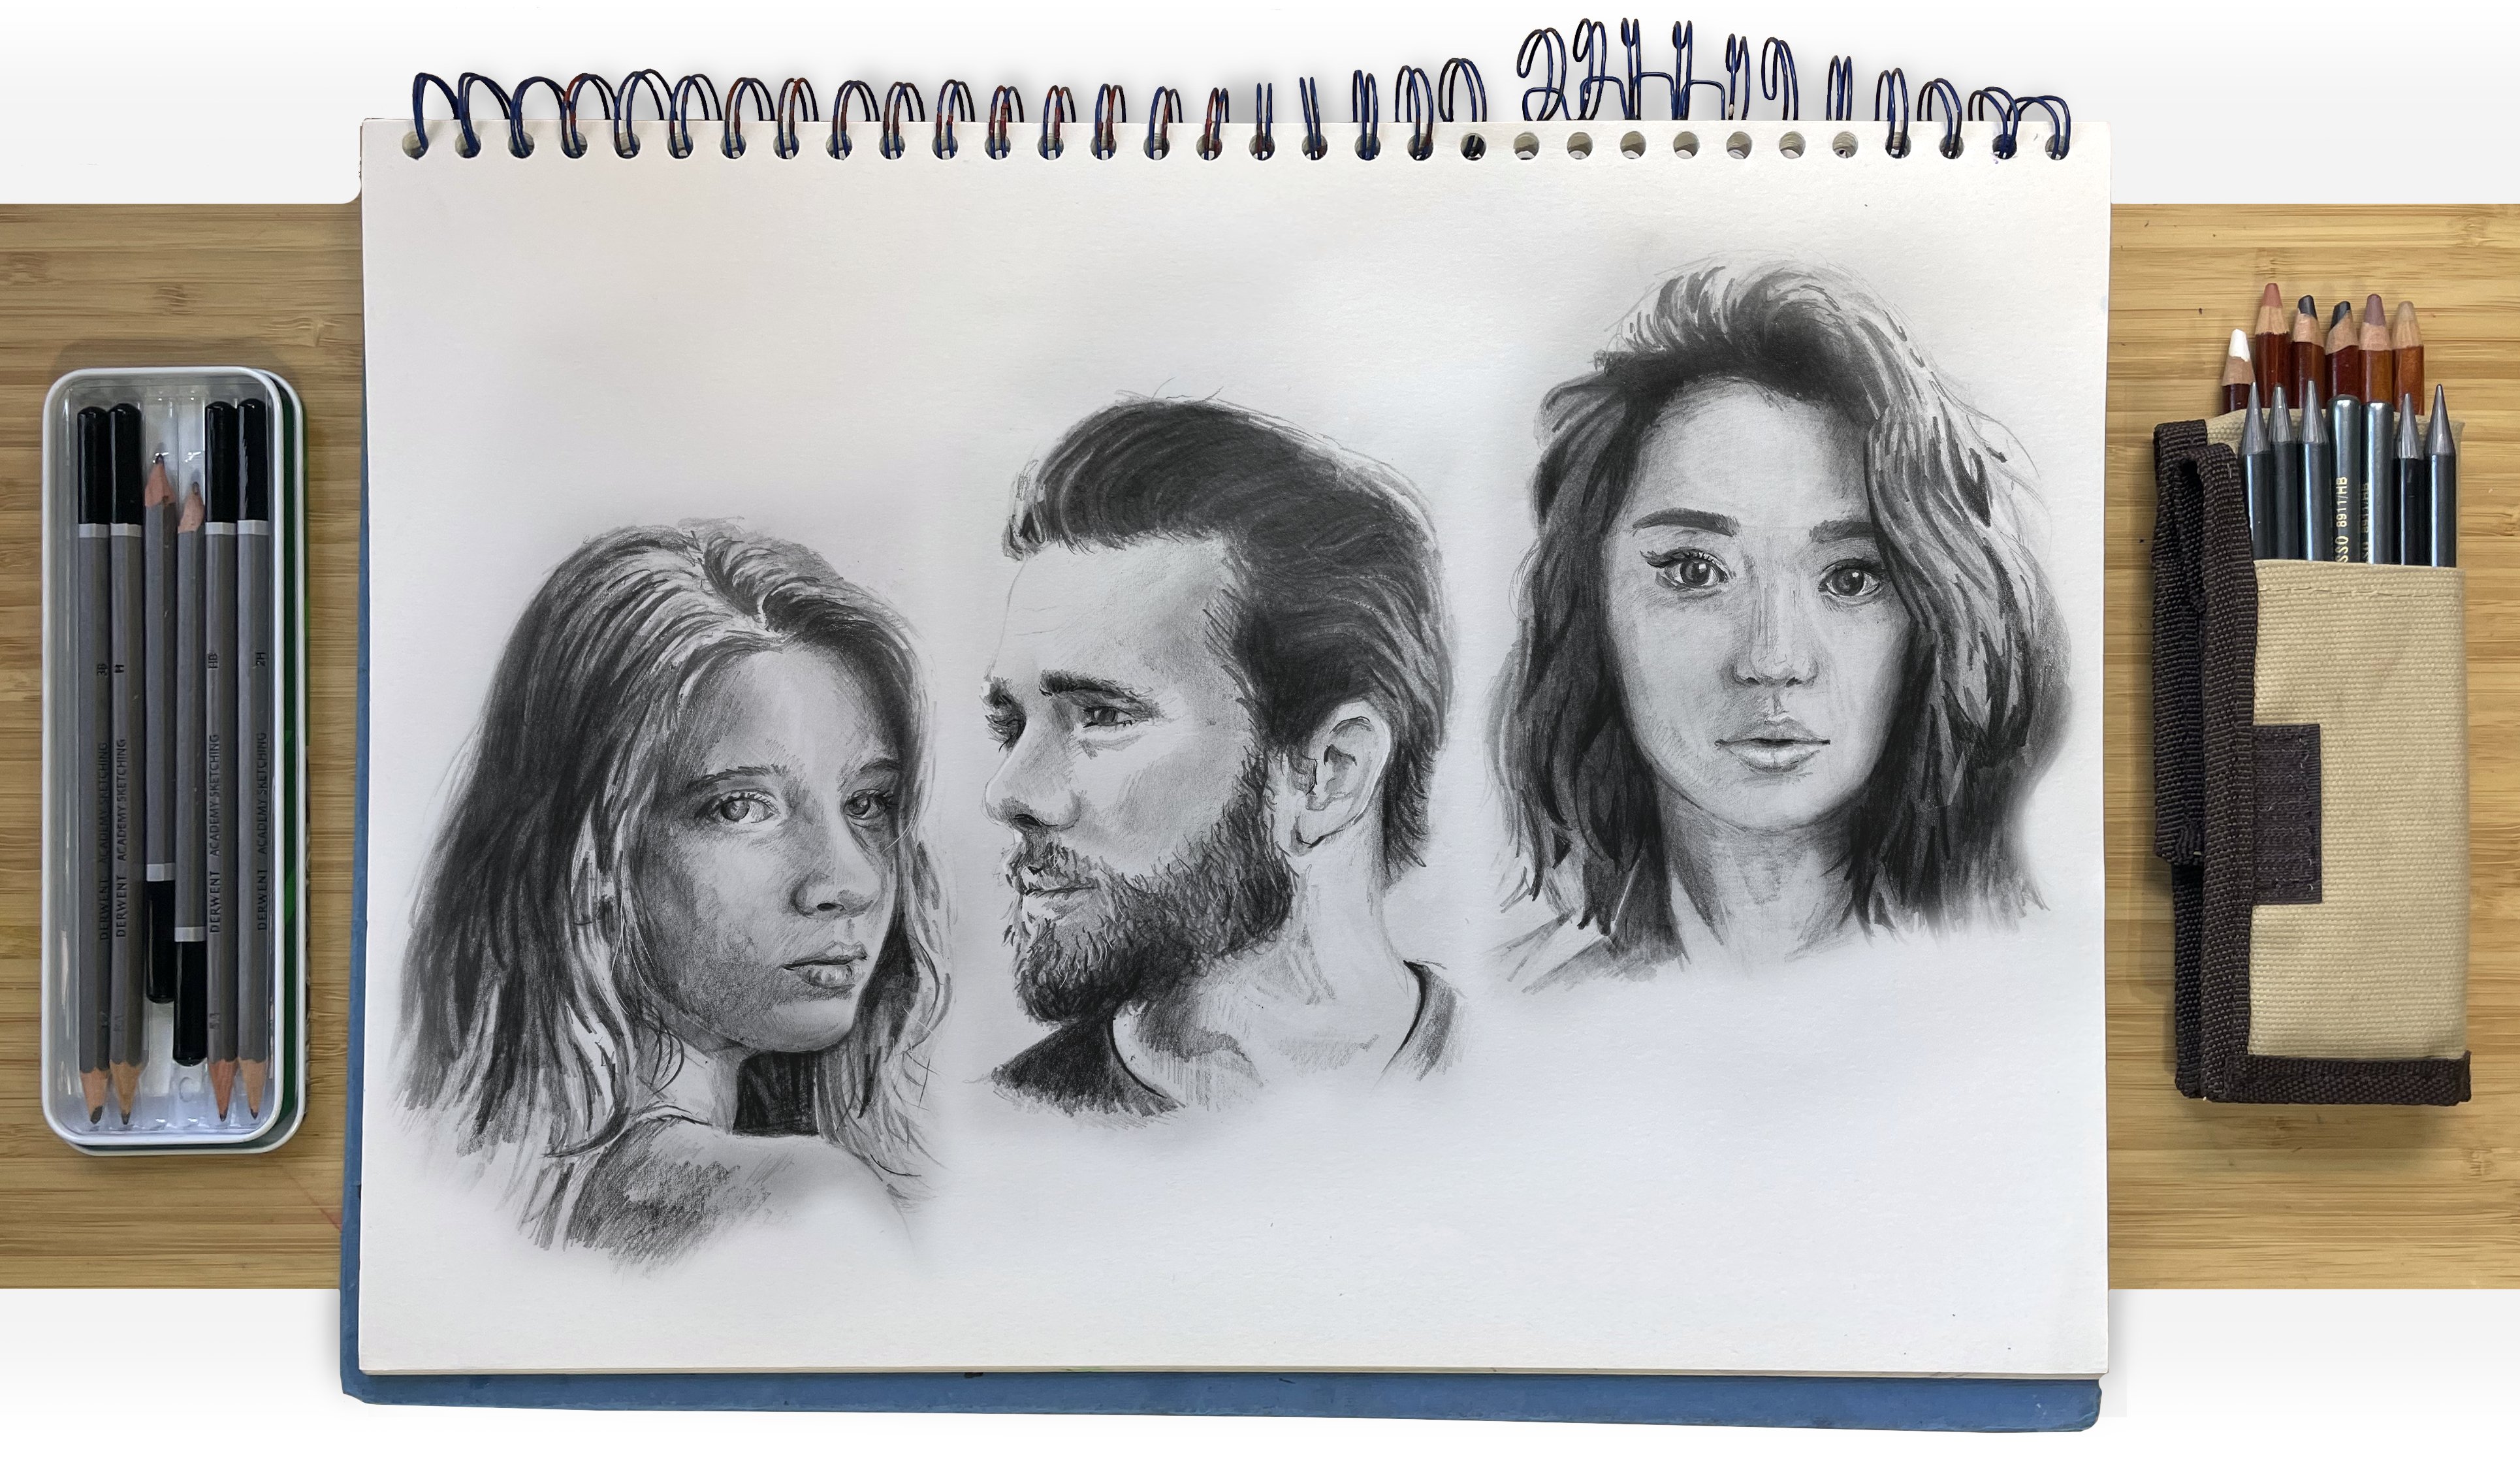
Drawing portraits is tricky, we’re constantly looking at the faces of everyone we meet so as soon as we try to draw someone we can immediately tell if something is off or does not quite line up correctly. For a long time I often hid my anatomical inaccuracies by masking mistakes with big hair, bushy beards or even sunglasses. Then, whenever I have tried to find an established method to follow and find the correct proportions, I became bogged down and lost in grids, dividing lines and rulers.
What I’ve set out to find is a beginner friendly place to start to find the correct shape and proportions that will help as I explore portraiture and anatomy more deeply. In this post I’m going to share my findings for what’s currently working for me, so if you’re interested let’s get started!
How to draw a head from Front view
Let’s break this down into the simplest steps we can – and you may be expecting this if you are familiar with other tutorials – we will start with a circle. The circle obviously represents the sphere of our cranium. It only looks like a circle because we draw in 2 dimensions.
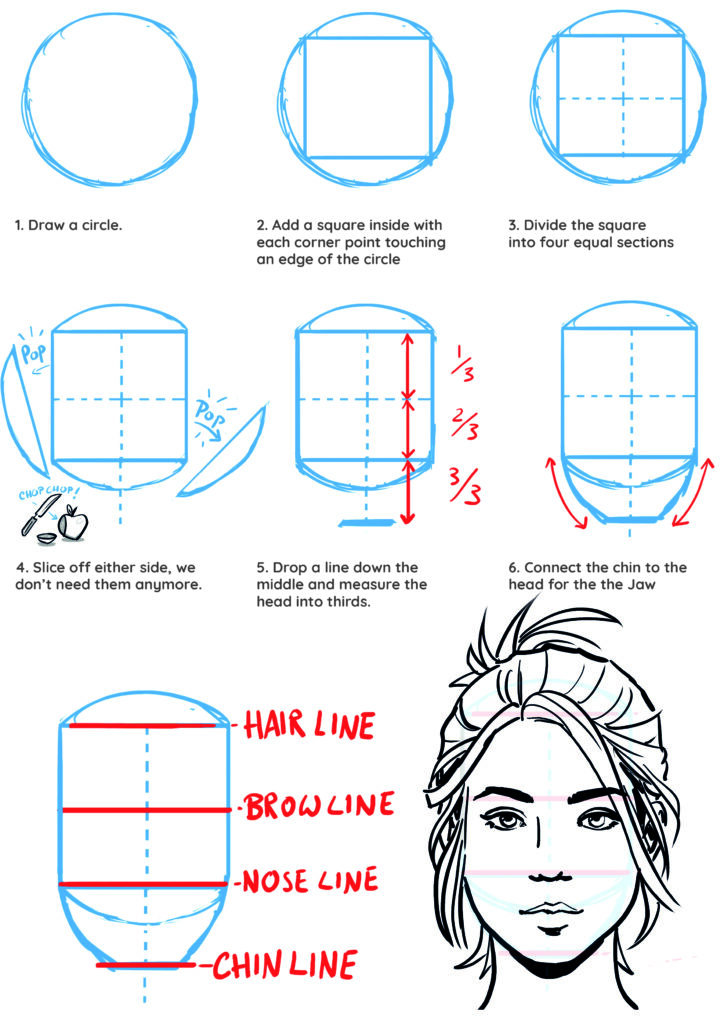
With these four red guide lines I have everything I need to start filling in the features. The upper line is the hairline is where the hair starts – if there is hair! However, even if you are drawing a shaved head, the notional hairline is useful to keep in mind when considering the proportions of the face. For example the second line is the brow line and roughly the point at which the eyebrows should lie. The third line is the nose line. Specifically, this is the bottom of the nose. The last guideline is the height we should define the chin.
How to Draw a Head Profile
Let’s rotate the head to see how to construct a view from the side. With the head turned to the left, we can use a similar process to build our framework to draw on.
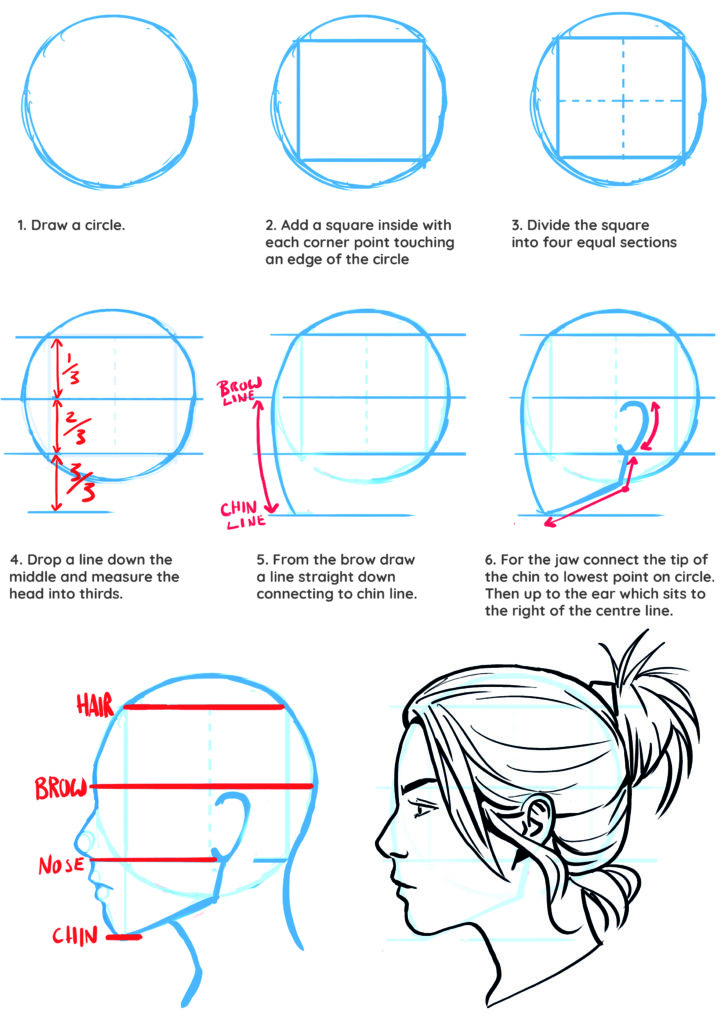
Again we can find the hair, brow and nose line along with where to position the ear and jaw, although be mindful that every face is different. The spacing between the 4 guidelines also tends to vary from face to face. So try experimenting with the spacing, you can push it to the extremes if you want, giant chins are always fun.However today let’s stick to the basics!
TLDR: Just draw an egg and give it some eyes
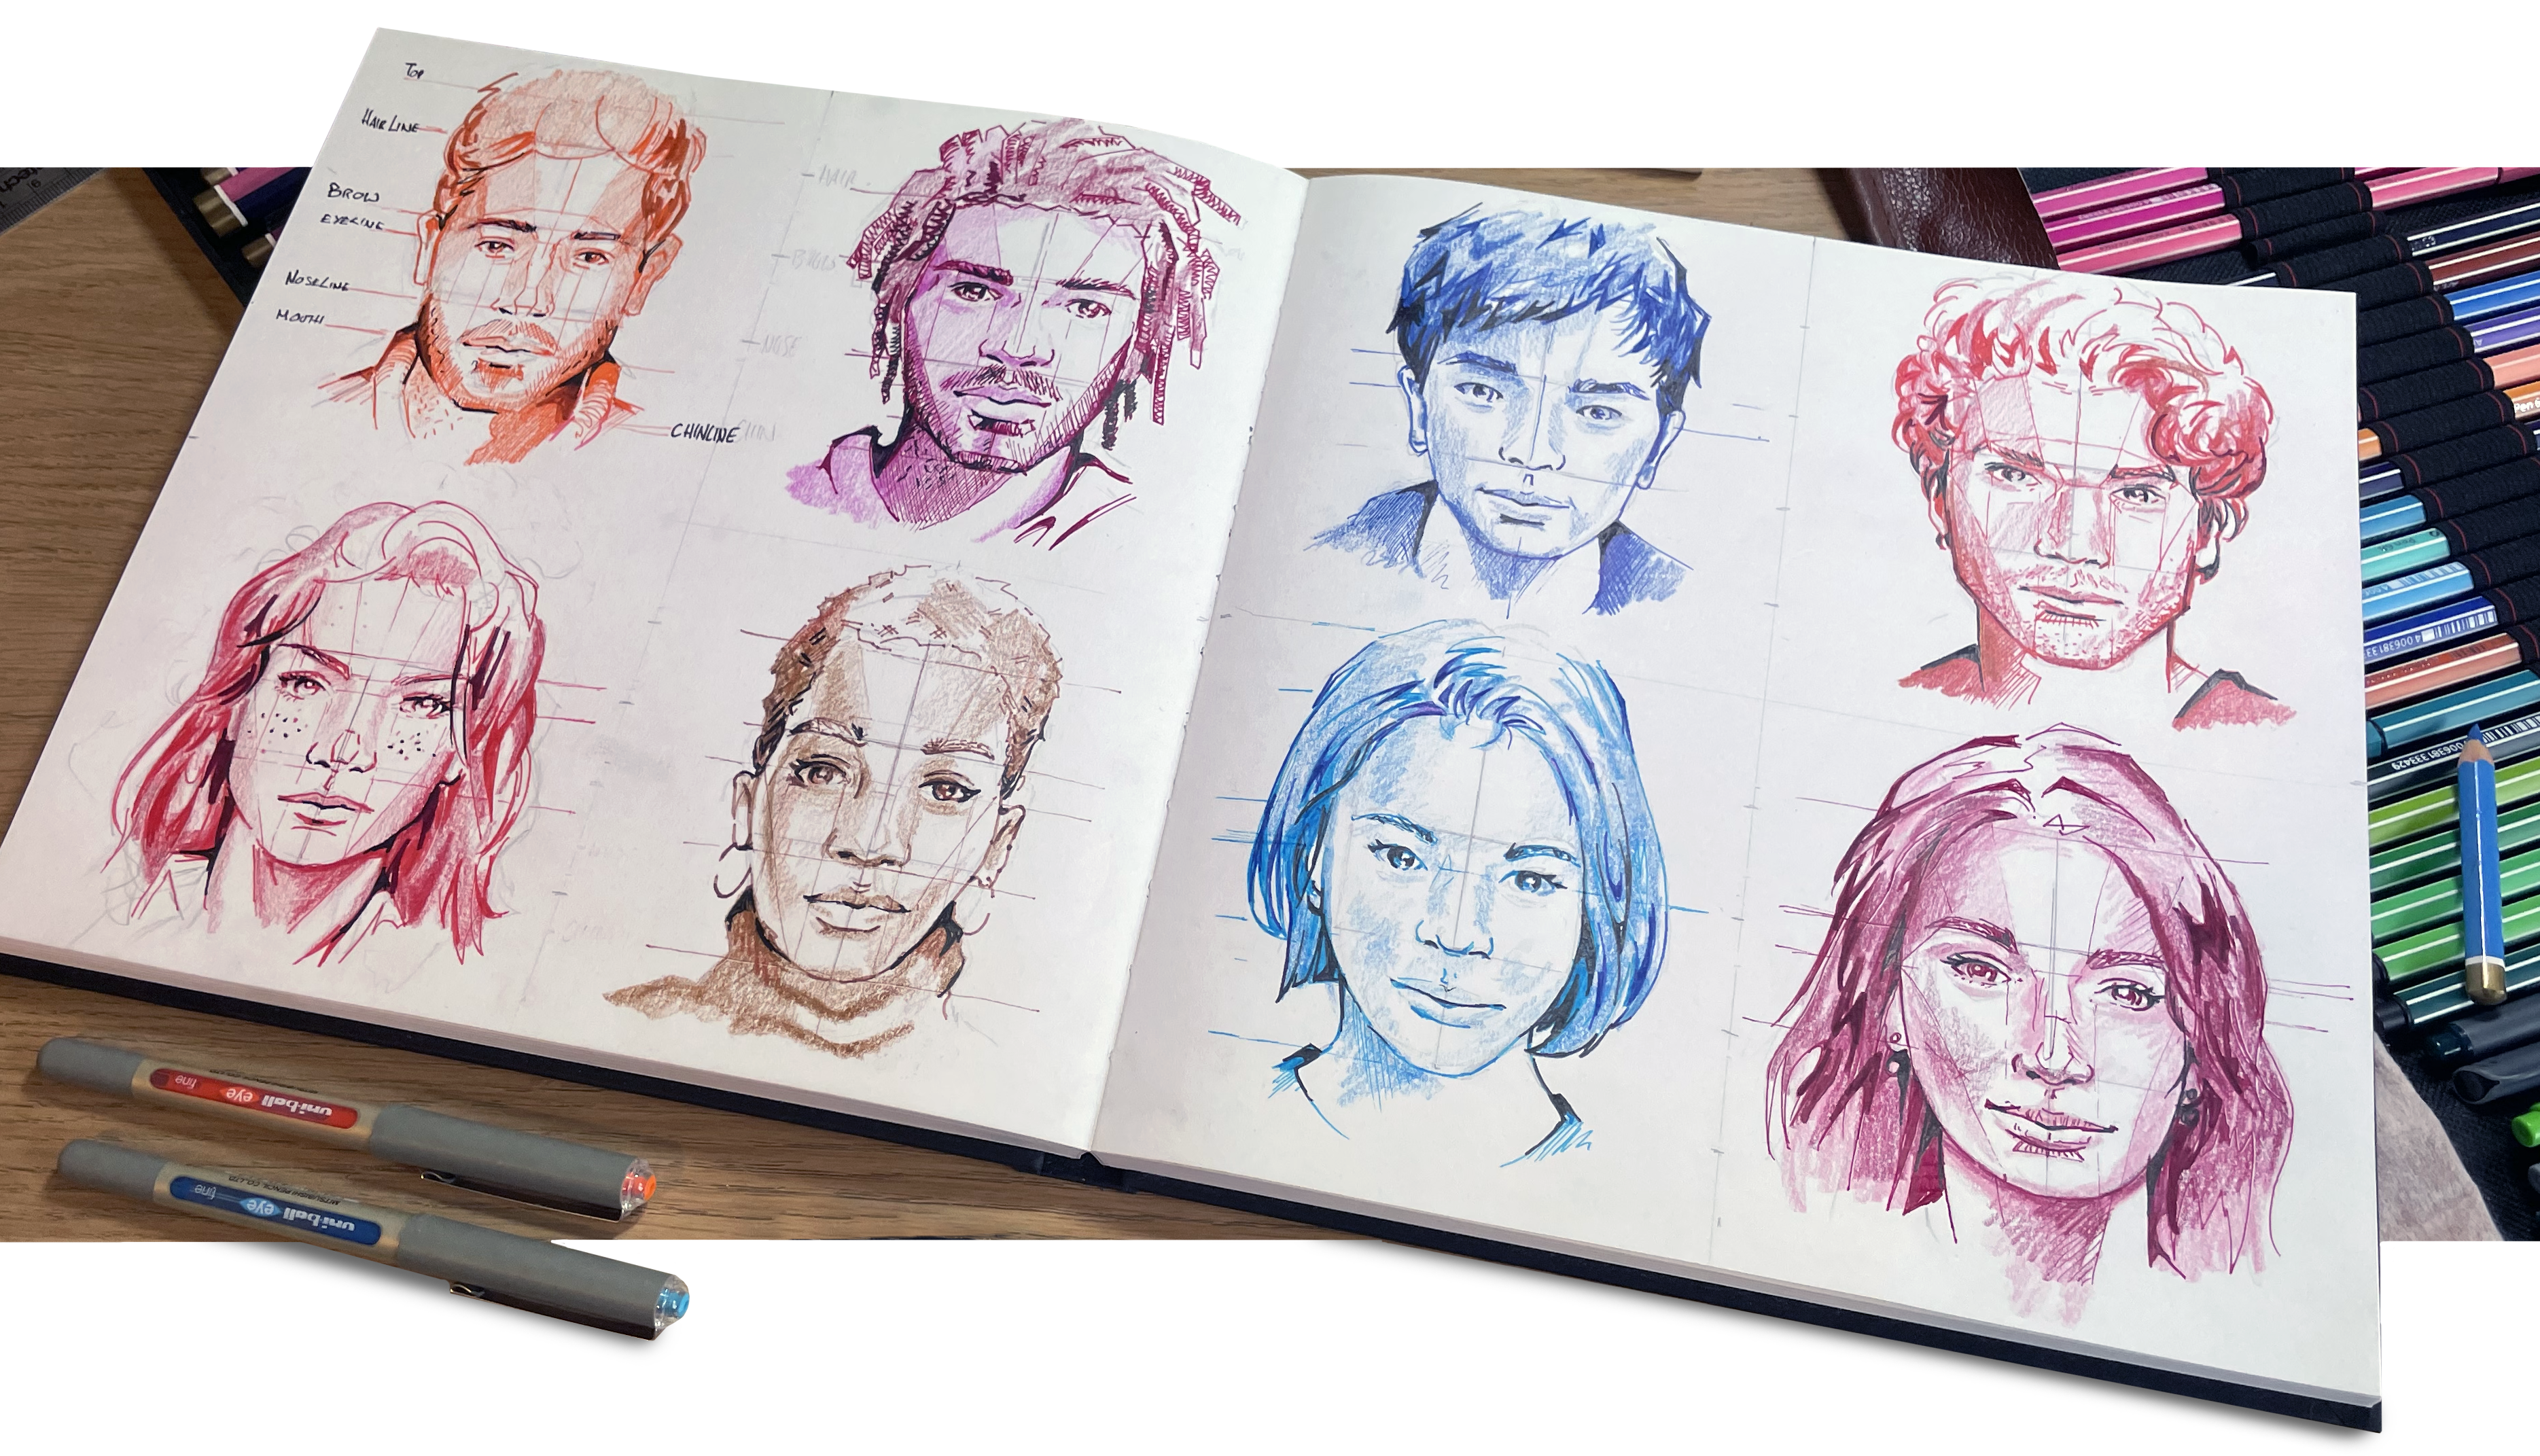
The more I’ve explored methods of drawing portraits from all angles I’ve discovered that every artist has their own slightly different method. Each one using their preferred parts of different techniques, learning from each other to find a process that works for them. I’ve also found that you can follow these guides religiously step by step and you’ll often end up with heads made of boxes and spheres drawn like an architect’s blueprint. There seems to be a balance between finding your guidelines for proportions and choosing when to focus on your observational drawing skills. Some people have long heads and deep set eyes, others have cute button noses and sticky out ears. Every face is wonderfully unique and that’s what I believe we should strive to capture,
For myself this is just enough of a guide to find the most important thirds of the face and the hair, brow, nose and chin lines before committing to a drawing. However if I were to take it further I would start to use the Loomis or Riley Method to really dig in to the planes and anatomy of the face. I have the most fun painting portraits that have the character of the person even if there are imperfections in the artwork, and look forward to doing my best to create and explore more. No sunglasses required!